Image credit: Moms Dish
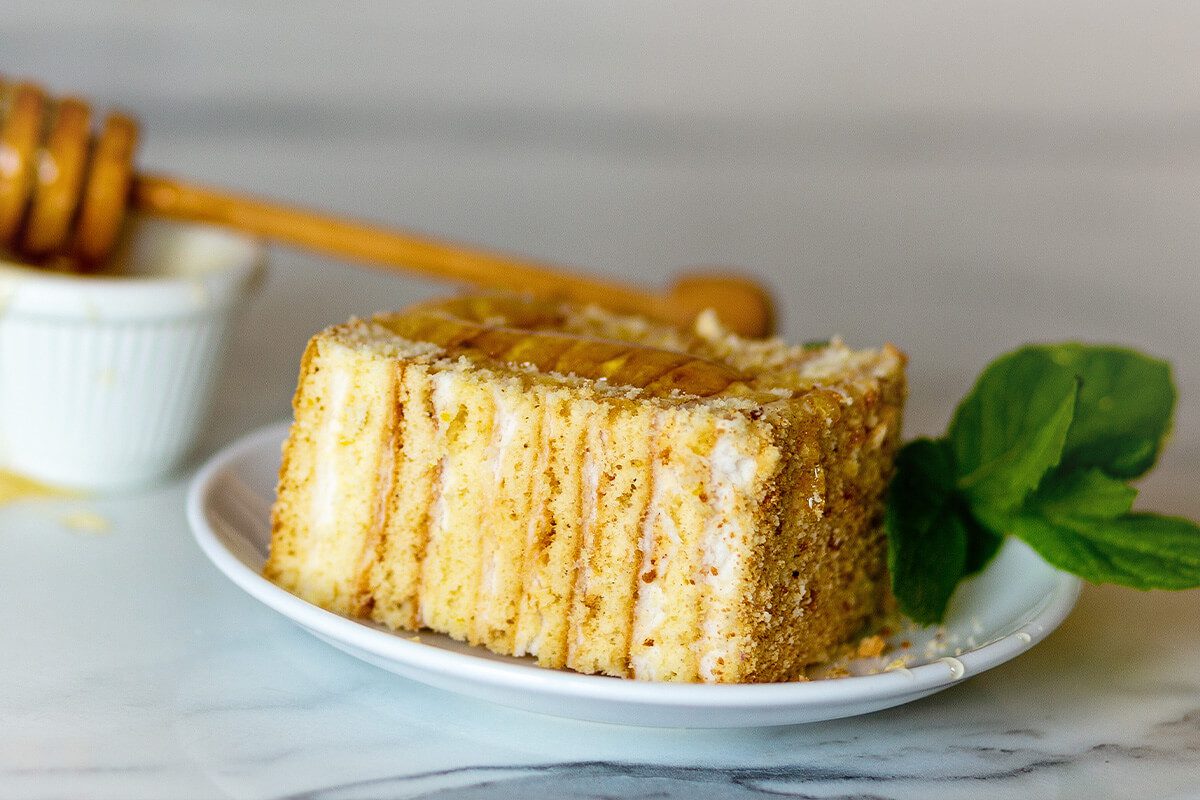
A beautiful dessert that’s eaten on special occasions is the Russian Honey Cake. The alternative name for this cake is also known as the Medovik cake. This gorgeous cake is a layered cake with notes of honey and caramel. Celebrate your next achieved milestone with a bite of this irresistible cake. Take a step and make it today with this easy recipe.

Russian Honey Cake
Image credit: Moms Dish
Ingredients
- 70 g
Butter - 2 tbsp
Honey - 200 g
Sugar - 3
Eggs - 1 � tsp
Baking soda - 1 tsp
Vanilla Extract - 375 g
All purpose flour
Cream
- 200 g
Butter - 226.8 g
Cream cheese (room temperature) - 453.59 g
Heavy whipping cream - 340.2 g Cooked
condensed milk
Instructions
- This cake dough is made in a steam bath. Preheat water using a bowl on top of the boiling water, make sure the bowl doesn�t melt. Place butter, honey and sugar, and let it stand there until it's all melted.
- In a separate bowl, beat eggs with baking soda until they have one consistency. Slowly add egg mixture to the batter, continue mixing the whole time while adding.
- Cook for about 30-40 minutes, until the colour changes. Take it off the steam bath, add vanilla extract and let it sit for 10 minutes. Add flour to the dough; it may still be sticky after adding the flour. Preheat the oven to 177 �C and line the baking sheet with parchment paper.
- Flour the surface generously. Because the dough is sticky, this will help you work easier with it. Optionally, weigh each piece of dough, to maintain the size. Roll out the dough into a round shape, large enough to be cut out later. Relocate the dough layer to the baking sheet by rolling it onto a roller, then unrolling it back out onto the baking sheet.
- Bake each layer of cake for 5-7 minutes, until golden brown. During the process of baking, roll out another layer to speed up the process. When it's done, remove it from the oven and cut out each circle by placing a plate over the top. This is the key trick to making all sides perfect. You'll need the cut off pieces for decoration later.
- Do not immediately stack the layers on top of each other, as they will lose their even shape. Rather, make sure they first cool off on a flat surface. Repeat until you are done.
Assembling the cake:
- Whip butter together with cream cheese and condensed milk. Once they are well mixed, add whipping cream. Whip until the cream is very thick.
- Divide all the cream evenly between each layer of the cake. Form the cake by stacking the layers of cake.
- Shred the leftover cake pieces in a blender and use them to decorate the sides of the cake. Let the cake sit in the fridge overnight. Before serving, let it sit out of the fridge for some time, as it will add more moisture to its taste.
Notes
Give it Time to Set: After you assemble your cake, allow it to be set in the fridge for at least 12 hours. This will not only help with the cake�s overall stability, but it will also make it much moister.
Recipe credit: Moms Dish
